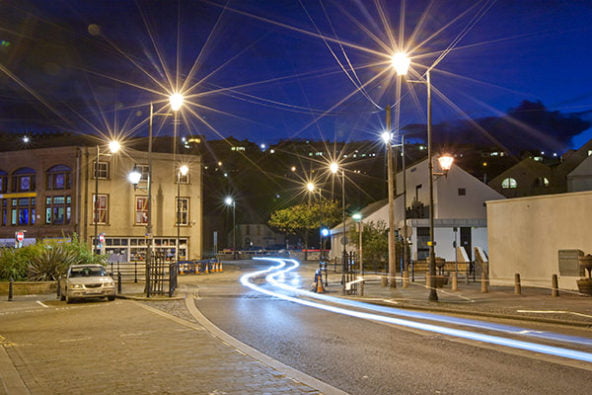
How to shoot light trails
- At 5th January 2019
- By Dave Wilson
- In General
I replied to a question on Facebook today and wanted to share it here. I cover this subject in the series of photography courses which I run so if you’ve ever wanted to shoot some light trails (like car headlights) follow this advice;
Firstly don’t forget the basics; a fully charged battery and room on your memory card (it does happen!). You’ll also need a tripod.
Start with the light fading in the sky after sunset because a little light in the sky will help separate the landscape from the sky.
Pre-focus your lens/camera before it gets too dark because you can struggle in low light to achieve focus. Once you’re happy with the focus switch the lens to Manual focus and don’t touch it for the rest of the night.
Set your ISO fairly low (maybe 100-400) and your camera to Manual.
Set your shutter speed to somewhere around the 30 second mark and if the resulting picture is too dark then just open the aperture one stop at a time (if it’s too light then close the aperture one stop at a time) until you’re happy with the result.
Top tip – either use a remote shutter release or if you don’t have one use the 2-second timer because this will help get a stable shot.
Don’t forget your composition either, just because it’s dark doesn’t mean it goes out of the window. Remember the Rule of Thirds for example and consider getting some foreground interest in the shot
A unique opportinuty

Eclipse Bowling in Workington opened their doors leading to some great photos including a view behind the scenes at the machines making the bowling alley tick. A great photoshoot under difficult conditions went beautifully!
 Telephone:
 Email:
 RSS:
RSS: